Wall cladding is quickly becoming one of the most popular ways to upgrade interiors and exteriors across the United Kingdom. Whether you're a DIY enthusiast redecorating a feature wall, a young professional looking to bring a modern flair to your flat, or a tradesperson offering home renovation services, knowing how to properly install wall cladding is an essential skill. This guide will walk you through everything you need to know to achieve a professional-quality finish, even if you’re tackling the project for the first time.
Wall cladding serves both aesthetic and functional purposes. It can transform tired walls into clean, modern spaces while offering added insulation, soundproofing, and protection. With a wide range of materials on the market—including MDF panels, PVC, composite, real wood and stone-effect options—there’s a style and price point that suits every home or project budget.
From preparation through to installation and aftercare, we’ll break down the steps in detail, and you’ll find advice specific to popular materials used around the UK. Read on and discover just how feasible and rewarding a cladding project can be.
What You’ll Need
Before you start cladding your wall, it’s essential to gather the right tools and materials. While the exact list depends on the type of cladding you’re using, here are the common ones you should prepare:
- Wall cladding panels (PVC, wooden, composite, etc.)
- Measuring tape and spirit level
- Adhesive suitable for your panel type
- Tacking nails or screws (if applicable)
- Handsaw or jigsaw
- Utility knife (for trimming if needed)
- Cloth for cleaning surfaces
- Caulk or sealant (optional, for waterproof applications)
Depending on whether the cladding is for bathrooms, kitchens, living rooms or exterior walls, materials like water-resistant adhesive or additional finish trims may also be needed. Always read the manufacturer’s installation tips to know the specific items required.
Step 1: Prepare the Surface
Proper preparation is key to ensuring your wall cladding installs securely and lasts over time. Start by clearing any furniture and removing obstacles from the wall, including plugs, hooks, or switches.
Clean the wall surface using a mild detergent and damp cloth. It’s essential to remove any dust, grease or loose paint that may prevent proper adhesion. If you’re applying cladding to a bathroom or kitchen wall, ensure the surface is dry and mould-free.
Use a spirit level to make sure the wall is flat. Uneven walls may require battening (installing wooden battens) to create a level surface. This is more common in older UK properties where plaster and brick walls may not be perfectly linear.
If you're fixing cladding panels using adhesive alone, the wall should be smooth and dust-free. If using battens or a mechanical fixing system, mark their positions with a pencil and measuring tape. Remember to account for cable routing or inset lighting if you're incorporating modern features.
Step 2: Measure and Cut the Panels
Always measure twice and cut once. Begin by measuring the height and width of your wall, considering the direction in which you’ll install the cladding. Vertical installations tend to make spaces feel taller, while horizontal styles evoke a modern, elegant aesthetic suited for living and dining areas.
Lay your panels flat and use a saw or utility knife (depending on material) to trim them to size. For corners, sockets and obstructions, create templates or mark the panel directly for precision cuts.
If your cladding uses interlocking edges (such as tongue-and-groove PVC), ensure the orientation of each panel matches—from the starting point to the end—to maintain consistency throughout the design.
Always dry fit the first few panels before fixing them to double-check the alignment. This is crucial in small UK bathrooms or alcove areas where measurements can vary within a few millimetres.
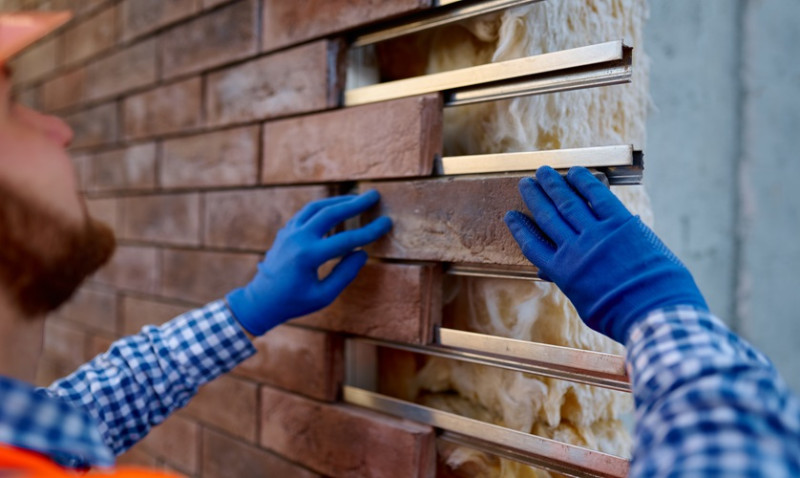
Step 3: Fix the Panels to the Wall
Once your panels are cut, you can begin installing them. The fixing method will depend on the material and whether you’re using adhesive, nails or screws—or a combination of both.
For adhesive application, apply a zigzag line of high-grab adhesive to the back of the panel, pressing it firmly into place on the wall. Hold for 30 seconds and move to the next panel. You can use panel spacers at joints if you want to allow for slight movement or expansion.
For wooden and composite cladding, nailing or screwing into battens is more secure. Position the first board using a level, fix it in place at the top and bottom, and continue from there. Panels with concealed fixings create a seamless look with no screws in sight.
If you’re installing cladding in a high-moisture area like a bathroom or kitchen, waterproof sealant should be applied at the joints between the panels and along the base edge to prevent water ingress. Waterproof trims can also help create a neat finish while sealing edges.
Step 4: Add Finishing Touches
Now that the panels are installed, take time to finish the edges and corners professionally. Trims and profiles such as internal corners, end caps, skirting, or starter trims can be purchased with most cladding kits and make a significant difference in appearance and durability.
If there are visible screw holes or gaps, filler or silicone caulk (colour-matched) can be used to mask imperfections. For timber cladding, you may also want to sand edges or apply a finish—such as oil, wax or varnish—depending on the style you're going for.
Clean the cladding with a soft damp cloth to remove dust or adhesive residue. Most wall cladding materials in the UK are designed to be low maintenance, so their smooth surfaces are easy to wipe clean.
Tips for a Professional Finish
- Always start installing from the most visible corner or section of the wall. This ensures any cut panels are near hidden edges.
- Pre-paint or stain wooden cladding if you're adding colour—it’s easier than doing it after installation.
- Mix panels from different packs to avoid colour inconsistencies in natural-effect cladding.
- Use masking tape to protect surrounding surfaces during adhesive applications.
- Check temperature and humidity levels before installation—some panels may expand or contract slightly with climate changes.
Popular Types of Wall Cladding in the UK
| Type | Best For | Key Features |
|---|---|---|
| PVC Panels | Bathrooms, kitchens | Waterproof, low maintenance, lightweight |
| Wooden Cladding | Living rooms, feature walls | Natural look, stainable, eco-friendly |
| Composite Panels | Commercial, modern homes | Durable, weather-resistant, long lifespan |
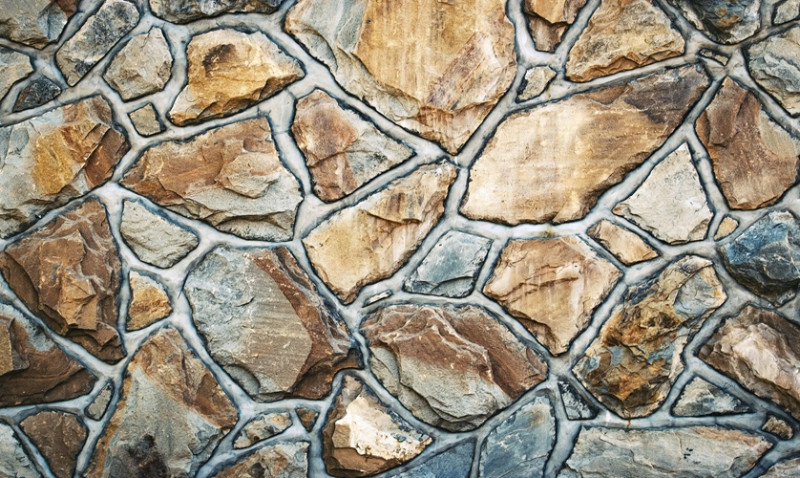
| Stone/Brick Effect | Accent walls, loft conversions | Authentic texture, strong visual impact |
Conclusion: Transform Your Walls with Confidence
Installing wall cladding is a hugely satisfying home improvement project with plenty of visual payback. Whether refreshing a bathroom with sleek PVC panels or adding rustic timber charm to a hallway, the process is very achievable with the right tools and a good plan.
With thousands of UK homeowners turning to wall cladding for its fast installation and long-term benefits, now’s the time to get involved. By following these step-by-step instructions and choosing materials appropriate to your space, you can achieve a stylish and professional-looking interior without the need for expensive contractors.
Have confidence, measure carefully, and transform your plain walls into standout features that uplift the entire room.
Ready to start your project? Browse our curated collection of wall cladding panels to find the perfect match for your space.
Trending articles
- How to Get More Insulation And ... Feb 2026
- How Much Does Insulation And Cladding ... Feb 2026
- How to Find a Reliable Insulation ... Feb 2026
- Cladding Insulation Costs UK 2026: ... Feb 2026
-
 How To Insulate and Clad Your ...
Jul 2025
How To Insulate and Clad Your ...
Jul 2025
-
 How You Can DIY External Wall ...
Jul 2025
How You Can DIY External Wall ...
Jul 2025